Power XL Table v24.1
Documentation and Troubleshooting Guide
Content
- Introduction
- Overview
- Support
- Versions
- Prerequisites
- VPService Visual
- Rules and Limitations
- Setup and Configuration of the Visual
- [Power XL] Tab
- Save Layout
- Import
- Reset
- Windows Authentication
- Enable Add
- Enable Delete
- Always Show Insert Row
- Fetch All Data Before Load
- Validate All Records
- Discard Layout Changes After Save
- Row Selection
- Apply Filter to Entire Report
- Display Operation Buttons As
- Enable XLSX Export / Enable PDF Export
- Enable XLSX Export / Enable PDF Export
- External Stylesheet
- Lazy Load
- Lazy Load Row Number
- Insert Security Measure
- Column Properties
- Debug
- Troubleshooting
Introduction
This document describes Power ON’s write-back capable tool, Power XL Table (PXLT). The product is a custom visual developed for Microsoft Power BI, that enhances the user experience by enabling end-users to make permanent changes on data – aka write-back – enriching it with text input controls (like how you can see on modern html pages, e.g.: date pickers, dropdowns, rich text) as well besides the traditional look and see feeling.
On the following pages you will see/ learn
- a detailed overview of Power XL Table,
- how to use it in your reports together with some common use-case implementations,
- how to configure it properly
- what the pitfalls are you might encounter and how to overcome them.
Audience
The audience of this document are both technicians (developers, DBAs, BI professionals) who are aware of the depths of SQL Server, SSAS Tabular models, Azure Services, Excel and Power BI, but also users who mostly focus on building and preparing reports using Excel or Power BI Desktop.
Some sections are focusing on more technical specific subjects.
Contact Us
If you find something unclear for you, ask for support either from your local IT or from Power ON by submitting a ticket on our site: https://support.poweronbi.com.
Overview
Power XL Table lets users edit any type of row-level information in Power BI. Most typical use case is managing dimension type data (e.g.: customers, products, materials etc.) – adding or removing records, editing existing members, changing attributes – as well as performing simple data entry workloads. One can consider this visual as a replacement for an existing, simple form-like application, designed for master data or dimension data management.
Power XL Table offers the following built-in features and components:
- Writing-back values to the underlying data source
- Date Time/ Month/ Time picker for DATETIME data type columns
- Color picker for color like data type columns
- Check Box or Radio button control for BIT data type columns
- Dropdown list (called Selection) control for replacing key with values
- Supports copy and paste selected cells to / from Power XL; Microsoft Excel
- Conditional formatting for any type of columns
- Setting tens of predefined table formats, cell styles, chart options, sparklines
- and many more.
It is worth to describe in high level how write-back works for Tabular models. Depending on your data source (SSAS In-Memory, SSAS Direct Query or SQL only) Power ON Write-Back Service performs the following operations:
- Captures the modified value together with its tuple and the user context; After the service understands what to do, determines what T-SQL statements should be executed based on the change and the structure of the model.
- Executes the compiled T-SQL statement against the underlying data source (fact table) to save the modifications
- In case of SSAS in-memory models it will reprocess the table.
- Initiates a refresh on the visual, so that the changes will appear in the report.
Support
Check out Power ON Knowledge Base articles at: https://support.poweronbi.com under [Visuals] » [Visual Planner] for common use cases, tips, troubleshooting tools.
Please note, that in order to access the articles, you need to register on the site. It is advised as you will be able to submit tickets if you encounter any difficulties or issues, so that our support team can give you the best service. You can also email us at: vizsupport@poweronbi.com
Versions
This document describes the latest version of Power XL Table.
The most recent visual is PowerXL_table.1.3.2.pbiviz.
How can you download the different versions?
- Register at store.poweronbi.com site with the same domain name you have registered originally. During the registration, please make sure to use the email address for both the username and email address field.
- After login:
- Click on Visuals in upper right corner
- You can find our available write-back capable visuals and their different versions.
- Pick the preferable version of Power XL Table and click on Download
- You can even download its Release notes, if you like.
Prerequisites
Write-back Service
You must have a working and configured Write-Back Service (PPWebService) installed in your environment. If that is set, in order to build a report, first you must import the Power XL and vpService pbiviz files into your Power BI Desktop instance. Naturally, you need to do that for each report in which you want to use PXL. The visuals will be stored in the report itself, so other people will also be able to use the write-back capabilities, if they open it. In case of PowerBI cloud services there is an option to store the custom visual in a centralized repository for easier management. You can find more information on this URL: https://docs.microsoft.com/en-us/power-bi/developer/visuals/power-bi-custom-visuals-organization
Before you begin, make sure that you have a properly configured Write-Back Service (PPWebService) that is accessible from the point of the Report Server.
For more information about configuring the PPWebService check out PowerON Knowledge Base articles at: https://support.poweronbi.com under Visual Planner – Write-Back Service for more details.
Please note, that in order to access the articles, you need to register on the site. It is advised as you will be able to submit tickets if you encounter any difficulties or issues, so that our support team can give you the best service.
In case of on-premise installations or virtual machines hosted in the cloud make sure that your Power BI Report Server can access the host IIS machine of the PPWebService.
In case of Azure, the Web Applications are accessible by default. The webservice must have a dedicated connection string configured for the data source in the web.config ‘connectionStrings’ section that is pointing to:
- In case of SSAS models: the used SSAS Cube
- In case of SQL only models: the used SQL database.
The web.config file can be found under the WWWRoot folder.
Connections to the data sources should be configured by your IT team. Please refer to the following article in our knowledge base on how to add ones at:
https://support.poweronbi.com/portal/kb/articles/how-to-add-a-new-data-source-for-write-back
You can find examples of valid connection strings for different data sources at: https://www.connectionstrings.com/
The PPWebservice service account - used in the connection string - must have the following permissions:
- In case of SSAS models: administration right on the cube, plus data reader and data write roles on the underlying data source database of the cube.
- In case of SQL only models: data reader and data write roles on the SQL database.
The end users (or the user / Active Directory group they are in) must have:
- In case of SSAS models: data reader membership.
- In case of SQL only models: data reader role.
In case of impersonation enabled, then the end users must have data writer role on the underlying SQL databases.
VPService Visual
The VPService is a helper visual which establishes the connection between our newest visuals and the Write-Back Service. VPService is updated automatically from the web, you do not need to update it manually, like other not-legacy versions of the visuals.
The benefits of this solution:
- faster release processes: switching from one version to another is much faster, which results in a quicker support from our side (e.g.: in case of implementing new features)
- You can change between the versions of the visuals easily.
The functions of VPService:
- Saves the changes
- Saves the comments (e.g.: in Data Entry Matrix visual)
- Sends the user information
- Opens the pop-up windows (e.g.: in Table Editor visual)
How to Configure VPService Visual
After importing the visual you can see its icon () under the built-in visuals. You can check its version by right clicking on the icon and selecting ‘About’ in the menu. A pop-up window appears with the version information.
Add the VPService helper visual to your Power XL Table related report.
Add an arbitrary field to VPService visual, e.g.: an ID.
The content of the [Web Service] » Url property has to be exactly the same as in Power XL Table ([Power XL] tab » [Data Entry] section » Writeback Service URL)!
Warning Message
This warning message can be seen, when
- the user is building the report in PowerBI Desktop,
- the report is in Edit mode,
- the report is in Reading View mode and the user tries to save the changes and there is no VPService connection.
- This applies to all VPService based visuals (e.g.: > TE v2.7.23, DEMx v4.x, PowerGantt, Power XL Table visuals).
Rules and Limitations
As all custom visuals developed for Power BI, due to Microsoft’s policies Power XL Table also has the following limitations:
- Renaming editable columns and tables in the Power BI report are not supported. They must be the same as they are called in the used data source.
In case of SSAS models, the names should be equal to the names of the entities (visible in your model or in your report Fields sections).
In case of SQL data source, the names of the entities should be the same as they are in the SQL tables (e.g.: if your table in SQL is called Customer, it should NOT be called Customers in your report). This rule should be also applied for the names of the fields / columns.
- The characters ‘[‘ and ‘]’ (brackets) are not supported in measure names
- The character ’.’ (dot) is not supported in table names, but they can exist in schema names. If you have unsupported characters in your table name, we recommend creating a view on top over the table that complies with the required format and use that view when writing back.
- All custom visuals developed for PowerBI have a default limitation set by Microsoft which is that 30.000 records can be displayed at one time. If your underlying table has more rows, consider using slicers in your report so that you will edit only a subset of the data and have a seamless workflow.
- Write-back to measures is not supported by Power XL Table. Only row level data can be modified. If you want to change the values of measures use the Data Entry Matrix (DEMx) visual instead. Power XL Table is intended to be used in cases when you want to modify descriptive, dimension type data.
- Columns that are used as a data source for Selection cannot have TEXT or NTEXT data types if you DO NOT use the SmartFilter technique (described later). If you use this technique the restriction does not apply. To make sure if your column is supported for this control, execute a SELECT DISTINCT on the column. Error means that you cannot use this column. The solution is that you should change the data type of the column to VARCHAR(MAX) or NVARCHAR(MAX)
- Non-writable views which serve as a data source for the fact table are not supported for write-back. Either materialize your view into a physical table, reduce the complexity of the view or you can create INSTEAD OF INSERT | UPDATE triggers to handle the operation. Typically, non-writeable views are that contains complex SQL queries with multiple joins, CASE statements in WHERE clauses, CTEs (Common Table Expressions), aggregations. You can test your view by duplicating it under a different name and executing an INSERT statement against it.
- In case of on-premise Power BI Report Server at least January 2019 version is required together with Power BI Desktop 2019 January or more recent versions.
- In the case of older versions of Power XL Table than v1.2.0 after changing to a bookmark, it can be experienced that a custom column can be found in a spot where a PBI column was before. The solution for this situation is that the original layout (not the bookmarked one) has to be saved with ‘Save Layout’ icon and [Save this report] button (
) in ‘Edit’ mode.
- If the “Reset filters, slicers, and other data view changes you've made.” button indicates that the report is modified (the button is yellow), then it has to be pressed before going to ‘Edit’ mode. Otherwise, the visual will have the settings which were set in ‘Reading view’ to the bookmark, not the original report settings.
- Cutting rules
- Cutting out the whole data table is allowed in ‘Edit’ mode, but not possible in ‘Reading View’
- Cutting individual columns is disabled in ‘Edit’ mode no matter what the column type is.
Copy-Paste Limitation
Starting from this version, there are limitations on the number of cells that can be pasted at once in the visual. The specific limits depend on the user's context and the type of sheet they are working on. The limitations are as follows:
- If the user is on a sheet that is not the Data sheet (applies to Edit Mode, Reading View, and other views):
- The limit is 40,000 cells for pasting operations.
- If the user is on the Data Sheet in Reading View:
- The limit is 40,000 cells for pasting operations.
- If the user is in Edit Mode and wants to paste into a datatable that contains formulas:
- The limit is 3,000 cells for pasting operations.
- If the user is in Edit Mode and wants to paste into a datatable that contains the =IFISROWDIRTY() formula outside of the range where the user intends to paste:
- The limit is 1,000 cells for pasting operations.
If the user attempts to paste more cells than the specified limitations, a pop-up message will appear to notify them about the exceeding limit. This is done to ensure optimal performance and prevent potential issues that may arise from pasting an excessive number of cells.
By adhering to these limitations, users can work within the defined boundaries and maintain the overall functionality and performance of the visual.
Setup and Configuration of the Visual
This main section describes the available configuration options for Power XL Table. Also, the following pages describes a short step by step instructions for building a simple report using PXL. You will find the details of the configuration elements later in this document.
Validate the Write-back Service
After installation you might want to be sure that the Write-Back Service is installed properly. You can validate that by navigating to your deployed URL, which is in the following format:
http(s)://yourserverName/PPWebService/PPWebService.svc
If you see the following page after the page load, then the Write-Back Service is up and running.
Power XL Table Legend
Designer ribbon can be collapse with ^ symbol in its right bottom corner.
Helper tooltips appear if you hover above the icons:
Clear all Filters
The Clear All Filters button enables you to remove all the filters that have been applied to the column headers in the visual. To see the Clear All Filters button and use the feature, you have to enable it by accessing the Power XL Tab> Designer ribbon>Show Clear All Filters. By default, this setting is turned off.
Note: The Clear All Filter button affects the Apply Filters to Entire Report setting. Consequently, using the Clear All Filters button will remove filters not only from the current visual but also from other visuals in the report.
The Clear All Filter icon is shown in the following image:
Clear All Filter as Label as shown in the following image.
Import Data
The Import Data button allows you to import data using the following file extensions:
- xlsx
- csv (comma- or semicolon-separated)
- tsv
Note: The Import Data button is visible in the menu only when the Enable Import Data checkbox is selected.
Importing Data
To import the data, follow these steps:
- Click the Import Data button. The Upload File popup dailog window appears.
- Drag and drop the file into Upload window to upload the file. Alternatively, you can also search the file in your browser that you want to upload.
- Click the Import button to initiate the import process. The Import Finished message appears if the data import is successful.
Note: If the file extension is not supported, an error message appears.
Import File Requirements
Before you import a file, ensure the file adheres to the following conditions::
- Import files should consist of a single sheet only.
- Data in the file must start from cell A1.
- Include column headers in Row 1, matching the data table’s columns.
- Formatting won’t be imported with the data.
Optionally, it can contain an operation column with keywords like “add,” “upd,” or “del” for adding, updating, and deleting data. The operation column is not mandatory
- Remember, using the operation column is not mandatory.
- If no operation column exists, the backend checks for existing records by ID.
- If found, it’s treated as an update.
- If not found, the backend attempts to add the record.
Merging Data Examples
When merging data, consider the following scenarios:
- If the imported Excel file contains two columns, but the data table in the visual has only one column, the extra column from the imported file will not be displayed. Only the column that matches the data table will appear. Example: If the Excel file has columns A and B, but the visual’s data table has only column A, only column A data will be shown.
- When the visual’s data table has two columns, but the imported Excel file contains only one column, an error occurs during the import process. Ensure that all columns from the source table are included in the import file.
- If there is no common column between the visual’s data table and the XLSX file, the import is considered invalid. In such cases, the backend will generate an error message: “No matching columns found.”
Error Handling
When an error occurs during the data import process, the following scenarios are handled:
- If a fatal error occurs, a pop-up displays the corresponding error message. In such cases, the visual will not import the file.
- When some records can be successfully imported, but there are invalid records in the imported file, users have an option.
- They can download a report file that highlights the rows with errors.
- The report file allows users to correct the problematic rows and import again.
Setting up the Basics
After you launched Power BI Desktop, connected to a data source and imported the visuals (VPService, Power XL Table) into your report, configure VPService visual.
❗ Unlike other Power ON custom visuals, in case of Power XL Table please use the designer ribbon, if you want to set something up.
We have to tell the visuals where they can find the Write-Back Service and which connection they should use during the process. You can see detailed information in this chapter how to configure VPService.
The configuration options will appear in the designer ribbon after you dropped the first column into Power XL Table visual. You must complete the following steps in order to have a working report element for the write-back functionality.
Specific Details
The target table for the write-back must have a primary key defined with the followings to keep in mind:
composite keys are supported.
in case of SSAS data source the primary key must be part of the SSAS model and visible for end users, and it must be added to the visual as a field.
if there are any specific business rules for creating a key for a new record you either have to create your own custom trigger in your database to provide the new value during the operation. Or in case if you are able to compute the key based on existing data visible in the model with DAX, you can use the Computed Column property.
[Power XL] tab of the designer ribbon » [Data Entry] section: you must set the Writeback Service URL, Source Table, Connection and Type properties (see referring chapters) to make the Write-Back Service working.
Note! The content of Writeback Service URL property must be exactly the same as in VPService visual ([Web Service] » Url).
Write-back Service URL
Here you must set the Write-Back Service URL which should point to the hosting machine – or app service – where it was installed. Typical URL is:
http(s)://WEBSERVICE_COMPUTER_NAME/PPWebservice/PPWebservice.svc
Be careful not to have an extra slash at the end of the URL.
Connection
Specify the name of the SQL or SSAS connection defined in the web.config file of the webservice, or the connection string directly, or leave blank depending on the ‘Type’ setting.
Note: Maximum length of this property is 250 characters.
Data Type
This option is referring to the connection type that the Write-Back Service will use.
The setting is required.
- Data Connection Name: (former SQL Datasource) The connection is set in the PPWebService web.config and you will have to refer it by its name in ‘Connection’ property.
- Model Connection Name (former SSAS Datasource): Set a connection name in the ‘Connection’ property defined in web.config of the webservice.
- Data Connection String (former SQL): Set the connection string directly in the Connection property (leave the connection blank if using the default "SQLConnection" in set in the web.config of the write-back service; meaning, leaving it blank, it will automatically look for the connection called "SQLConnection" in web.config).
- Model Connection String (former SSAS): Set the connection string directly in ‘Connection’ property (leave the connection blank if using the default "SSASConnection" in set in the web.config of the webservice).
These last two options are used for testing, developing purposes primarily.
Source Table
It is important that you configure this property correctly as misconfiguration can lead to save errors. Please read this chapter carefully.
This property will tell the write-back service which table should be the target for data modifications. The name of the write-back target table needs to be entered here. Note, that the property is case sensitive! For example, if you put fields into the visual from the Product table, this property value should be Product as you want to save the modifications to the product table.
You should not rename tables or columns in your report.
In case of SSAS data source the value must be the name of the entity exactly how it is specified in the model.
In case of SQL only data source the value must be the name of the SQL table that is being used with the visual.
In case of SQL connections when the table is in a different schema than dbo, you need to make some adjustments. When you import a table with a schema to a report, Power BI automatically try to rename the table for you. For instance if you are importing hr.SalesPerson table, in the Fields section you will see it renamed like Hr Sales Person. Because of this operation, Power XL Table will not be able to determine on which table should it initiate the write-back process. Please do the followings to overcome this situation:
- Rename the table in the Fields list so that it contains exactly the actual SQL table name without the schema (in the example it is SalesPerson)
- Remove and re-add the columns to your Power XL Table
- Enter the full qualified table name into the ‘Source Table’ property in the format of schema.table (in our example: hr.SalesPerson)
Setting Primary Key
[Power XL] tab of the designer ribbon » [Column Properties] section: Last but not least you need to set the ‘Key Column’ for the primary key of your source table.
Primary key can be a single column or even a composite one too. In this last case you need to check in ‘Key Column’ for every column which represents as primary key in your table.
Numeric type of fields which have no aggregation on top of them must be set to Don’t summarize in the Visualizations » Fields » Values section. Especially check this setting in case of an auto-increment primary key. Otherwise, you will not be able to change values in those columns on which you have aggregations defined.
On the other hand, you can still display aggregated values in your visual, but you will not be able to modify those inputs.
Publishing and Testing the Report
When you finished with your report, publish it to either your On-premises Power BI Report server, or to PowerBI.com. The write-back will work only when your report is published, so you cannot test the full functionality in Power BI Desktop while you are authoring it. After publishing your report try to modify a cell value and click on save changes. Your modification should be visible in your report.
Completing the above steps, you should have a working, simple, write-back capable report using Power XL Table visual.
[Power XL] Tab
Save Layout
The Save Layout button is used to save the configurations and settings that have been set up on the designer ribbon or within the sheets. It does not write the data back to the database, but rather saves the layout preferences for future use.
When the Save Layout process is initiated, a loading circle is displayed in the top right corner of the interface to indicate that the saving is in progress. This loading circle serves as a visual indicator that the system is actively working on saving the layout.
Once the saving process is completed, a "Layout Saved" message pops up to inform the user that their configurations and settings have been successfully saved. This message confirms that the layout changes have been captured and stored for future use.
It is important to note that the Save Layout functionality focuses on preserving the layout preferences and settings without directly impacting the database. It provides users with the convenience of saving and recalling their customized layouts without affecting the underlying data.
Import
With this button you can import an Excel file which can contain more sheets with tables and data. If you import another file on top of the existing one, then the new import overwrites the previous import.
If there is no data table in Power BI to where it could merge the Excel data table, then you get the below error message:
Importing data underneath, the existing data table is not supported.
Reset
Clicking the [Reset] button will delete the layout, remove the content of external cells, and cancel any ongoing imports. However, it does not reset Power BI settings on the designer ribbon.
When the "Reset Layout" button is pressed, a confirmation window will appear to verify the reset action.
Windows Authentication
If you are in an On-premises environment using Power BI Report Server this setting must be turned on, so that the Windows credentials can be passed back to the underlying data source. If you are completely in the cloud - your reports are published to PowerBI.com service - and you are using Azure AD, the setting should be turned off, so that AD credentials will be used when accessing the data source.
In case of Gateway by turning on Windows Authentication will have the following effects: Instead of setting the PowerBI.com credentials in the Write-Back Service request, the visual posts the windows login context. This value (e.g.: domain\user instead of username@domain.com) will be set if you use USERNAME() in computed and/or default value columns (see later in this document) as well in SQL context variables. Also, this makes possible to use impersonation, and it is necessary to be turned on if Windows Authentication is the required option set for authentication in IIS for the Write-Back Service.
Enable Add
The Enable Add option allows you to add a new row to the data table. After you have added a row, you can enter new data or populate the fields within that row. If the check box is not selected, a new row cannot be inserted to the data table by any method.
However, it is essential to acknowledge that pressing the buttons alone does not automatically save the changes. To finalize the action and ensure the changes are saved, users must click the "Save Changes" button. This step guarantees that any modifications made, including the insertion or deletion of rows, are committed and permanently saved.
Note: Enable Add only applies in Reading view.
You can insert new row only if the Enable Add and the Insert Security Measure settings allow it. Otherwise, all the methods of inserting row are disabled.
Enable Delete
The Enable Delete option allows you to enable the option to delete rows permanently from the data table. If you disable this check box, you cannot delete a row using other methods.
To delete rows, you must select the Enable Delete and the Write Security Measure check boxes because enabling these fields allows you to use other methods of deleting rows.
However, it is essential to acknowledge that pressing the buttons alone does not automatically save the changes. To finalize the action and ensure the changes are saved, users must click the "Save Changes" button. This step guarantees that any modifications made, including the insertion or deletion of rows, are committed, and permanently saved.
Always Show Insert Row
When this option is enabled, if there is no data shown in the Power XL table within the current filter context, a new empty row will be displayed at the top. This empty row allows users to insert new values into the source table.
The row will not be displayed when there are already existing rows to show.
Fetch All Data Before Load
By default, it’s turned OFF.
OFF: The Power XL table visual will load maximum 30.000 rows from the source table.
ON: The Power XL table visual can load all data from the source table, even it has more than 30.000 rows. This may cause a much longer loading and displaying time for the visual.
Validate All Records
When the setting is ON:
The validation is performed for all records. The "Save Changes" button will not allow saving until all records, including old and unmodified ones, pass the validation.
When the setting is OFF:
The validation is only checked for modified and inserted records. The "Save Changes" button will not allow saving until the modified and inserted records pass the validation.
Row validation will not be triggered when a modified cell belongs to an inserted custom column.
New data validation rules can be saved by saving the layout and the report.
To use the OFF state of Validate All Records, at least one column needs to be set as the "Key Column" setting. If no key column is set and Validate All Records is OFF, a warning message will appear.
Note: If the setting is switched from OFF to ON, the data validation is not reapplied, so the data validation must be set again.
Discard Layout Changes After Save
When the setting is ON: After successfully saving to the database, any unsaved layout changes will be discarded, and the layout will revert to its last saved state.
When the setting is OFF: After successfully saving to the database, any unsaved layout changes will be retained.
Discard Layout Changes After Visual Reload
The Discard Layout Changes After Visual Reload setting allows you to specify your data-saving preference. By default, this setting is set as OFF. When it is set as ON, it affects how the visual manages unsaved layout modifications after specific events occur on the actual page.
The visual will discard any unsaved layout changes if one of the following actions takes place:
- Slicer Change: If a slicer is modified or adjusted.
- Filter Application: When a filter is applied to the visual.
- Cross Filtering: If cross filtering occurs with a different visual.
- Value Saving: Similar to the behavior of the Discard Layout Changes After Save setting.
Row Selection
The Row Selection drop-down box has following values:
- NONE:disables row selection from a table.
- CELLS:applies row selection to one cell or to a range in the master visual.
- ENTIRE ROW: enables row selection only if you select one or more rows headers in the master visual.
- BOTH: enables row selection if you select one or more cell(s) or entire rows(s) in the master visual.
Apply Filter to Entire Report
When the setting is ON: If a filter is applied to a column header, the filter effect will be applied to the entire report, affecting all visuals.
When the setting is OFF: If a filter is applied to a column header, only the visual associated with that column will be filtered. The filter will not impact other visuals in the report. Additionally, the filters will not be saved into the layout, meaning they won't persist when the report is reopened or reloaded.
Display Operation Buttons As
The default value of Display Operation Buttons As is Labels.
Icons: When this option is selected, the top row buttons will be displayed as icons, similar to the previous display format.
Labels: When this option is selected, the top row buttons will be displayed as labeled buttons, following the formatting style used in legacy visuals such as Table Editor and Data Entry Matrix.
Enable XLSX Export / Enable PDF Export
Now, you can export XLSX and PDF files. On the Designer ribbon in Power XL Table, there are "Enable XLSX Export" and "Enable PDF Export" settings that can be toggled ON or OFF. When these settings are turned ON, the "Enable XLSX Export" and "Enable PDF Export" buttons will appear in the top row, positioned above the Designer ribbon.
Detailed Validation Message Threshold
The Detailed Validation Message Threshold field allows you to specify how many invalid cell coordinates should be visible in the data validation error message.
For example, if you set the threshold value to 10 as shown in the following image,
then the coordinates of the first 10 invalid cells appear in the error message.
By clicking more cell(s) in the message, you can view the coordinates about the additional invalid cells in a new dialog box.
The default value of the setting is 0. If you retain the default value, then the warning message appear as "Some of your cells are invalid".
External Stylesheet
The External Stylesheet setting provides an option to inject CSS code to customize elements of the visual, such as buttons and labels. Users can either supply a CSS file as a URL or simply paste inline CSS code. Both solutions are HTML safe.
If you provide a wrong URL, the following error message appears.
To ensure that formatting from CSS appears correctly, it may be necessary to include the !important command at the end of some CSS properties after adding the value. For example:
example-visual-item {
color: white !important;
background-color: #5500ff !important;
}
Lazy Load
The Lazy Load checkbox enables you to control the display of the data within the visual. Enabling this checkbox also activates the Lazy Load Row Number field.
Lazy Load can be used with the Fetch All Data Before Load.
Lazy Load Row Number
The Lazy Load Row Number field enables you to specify the number of rows visible in the visual. By default, this field is preconfigured to display 500 rows. If additional data exists beyond the visible rows, you can scroll down to view it. The Discard and Reset buttons allow you to reset the fetched rows. Additionally, when the end of the data table is reached, the next 30,000 segments are fetched.
Insert Security Measure
The Insert Security Measure setting allows you to manage record insertion in Reading View.
To use this setting, you must add the SmartFilter visual to the report with a DAX measure. Then, in the input field of the setting, you must write the name of the same DAX measure in the following format:“TableName.FieldName” (e. g. Table.InsertSecurity)
If the SmartFilter is missing or the name of the DAX measure is misspelled (even if the DAX measure is set in the setting), then row insertion is automatically disabled.
The Insert Security values are:
TRUE - If the value of the DAX measure is not 0, true, or an empty string, then the new row(s) cannot be inserted. In such cases, the “Insert” button ('+' symbol) does not appear on the top row.
FALSE - If the value of the DAX measure is null, 0, false, “false”, “FALSE”, or an empty string, then the new row(s) can be inserted. In such cases, the “Insert” button ('+' symbol) appears on the top row.
Column Properties
Column Type
You do not need to set the data types for the columns that are on the visual, because Power BI recognizes them automatically. However, making changes in this setting will influence how the cell will be rendered and how it is going to behave. Types can only be set for those columns for which the aggregation is set to Don’t summarize in the report field’s list window as only these fields can be saved during write-back. For columns which are not part of the Power BI dataset, this setting remains hidden. You can choose from the types below:
Text
One-line Textbox in the grid.
Number
This type should be used in all numeric data types: decimal, currency, whole number.
Selection
Using this column type, a dropdown control will be rendered for each cell in that column. If you use this type, additional properties must be set, as the values are coming from another related – or lookup – table.
In this case the table has a foreign key with a numeric column which is in relationship with another table. The intention is instead of showing the numbers, you want to show the actual text representation of them and provide the possibility to choose from a set of values.
Usage of Selection type column:
- Set Column Type to Selection
- Source Table that contains the values for the dropdown list. You need to enter the name of the table as it is displayed in the Fields panel. If you connected to a SQL database directly, you need to provide here the name of the SQL table. If it is in a different schema then dbo, you need to provide that as well in the following format: schemaName.TableName
- Display Column value will be displayed after the lookup. Usually this is the text field of your lookup table.
- Value Column is the value that will be matched in the lookup table using the value in the current cell. Usually this is the key column in your lookup table.
When a source table provided there can be two ways of getting the data for the visual. By default, the visual will use the Write-back Service to retrieve the data by querying the underlying data source. With this method, RLS defined in SSAS will not be honored, as all data will be fetched from the source SQL table. In some cases, this extra round trip to the server can be slow. You can increase the performance and honor any existing RLS with the following technique.
- Import SmartFilter Helper visual to your report and add it to the report page. Use that one which is provided in the setup kit, or you can download it from Power ON Store (store.poweronbi.com).
- Add those fields (ID and name) to the SmartFilter visual, that are used for the dropdown, ‘Display Column’ and ‘Value Column’.
By this way the available values for the dropdown will be stored in the SmartFilter. Power XL Table will recognize it, so it will not query the Write-back Service.
If the dropdown value list is that long you cannot see every one of it, a scroll bar appears automatically on its right side. You can even search among the values by typing the 1st letter, it jumps to the 1st value which starts with that letter, and it’ll be highlighted.
When you hit “s” in your keyboard, it’ll jump the “SAFEWAY” value automatically.
Filter on SmartFilter
If you want to restrict the available values in the dropdown, you can do that.
After adding the fields (ID and name) to the SmartFilter in your report, apply a visual level filter on the SmartFilter to restrict the available values. In this case you will not see all possible values in the dropdown for selecting purposes, however you will be able to see those rows in the Table Editor visual, which have other values than the available ones.
You can find a detailed possible use case in this Knowledge Base article in this topic.
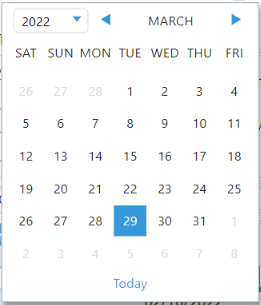
Date
Date type brings up a data picker where you can set the date:
The SQL Database field should be of the type Date or DateTime.
Custom
Changing the cell type/validation/setting of an existing column type will set the type to custom.
This kind of a column can be deleted by clicking on [Reset] button.
Checkbox
Column types for Boolean values can be set to Check box.
Rich Text
The content of this type of column can be edited in Legacy Rich Text Editor in both ‘Edit’ or ‘Reading View’ mode. The value is displayed by the same way as in TE v2 rich text type.
The editor opens instantly when you double-click on it or when you start typing to the cell, AND the content is not(!) read-only.
The editor does not open if the column / cell is read-only or when a write security rule makes the column / cell read-only.
You can save the rich text column content with the blue floppy icon, inside the editor.
Power XL Table can display the rich text type columns which were created in Table Editor, and the other way around.
Auto resize row height
When you change the content in a rich text column type cell the row will be resized and will show the whole content of the cell. The row height follows the size of the content.
When the visual is loaded, the rows will be displayed according to the content. Column width will not change.
Visibility of Rich Text Editor option in context menu
Context menu appears when you right click on the cell.
Rich Text Editor option in the context menu is only visible when the selected cell is outside of the data table. In this case, the original Rich Text Editor opens, not the Legacy Rich Text Editor.
Key Column
Power XL Table requires a primary key column (a unique value per row) to be defined in the table, which might be an identity column from SQL Server. If the key is not automatically determined by the SQL Server when inserting new records, then you must enter a value for it, or use some DAX calculations to define a default value.
You just need to check in Key Column for the proper column(s) as representing the primary key. You can use composite primary keys too.
Required
Turning this setting ON makes the column mandatory. If the required field has blank value, changes will not be saved.
Read Only
Turning this setting ON prohibits any kind of update on the given column.
After turning ON for a column, it will be read-only when the report will get saved and left the edit mode.
If a column is originated from a different table than the source, it will be automatically set to read-only.
Exclude from Save
If it is turned ON, the value will not be saved during write-back.
Read only setting should be checked in, when ‘Exclude from save’ is checked in.
If a column is originated from a different table than the source, or it is an aggregated column, it will be automatically set to exclude from save.
Write-back Security
You can prohibit modifications on a given row by creating a calculated column or a measure in your model or in your report. The formula complexity is not restricted, so you can develop any kind of logical evaluation of the present columns and the filter context to determine if the selected row is editable or not.
The write security column must return one of the following values:
- to disable modifications needs to return: 0, "0", null, "null", "NULL", false, "false", "FALSE" or ""
- to allow modifications, needs to return: any other value, preferred 1 or TRUE
- For instance, the following measures can be used:
- CanWrite = IF(VALUES('Product'[BrandId]) = 1;"";1)
- Which means that those products that belong to the Brand, where the Id is 1, will be read only.
- For a more complex case when you want to control security based on user privileges as well, you can use the following pattern:
- IsWriteable:=MAXX('UserMapping',IF('UserMapping'[UserName]= USERNAME(),"",1))
You need to add this measure to your Table Editor and enable the write security property for this column.
For a detailed example, please refer to the following article:
https://support.poweronbi.com/portal/kb/articles/implement-complex-write-security-per-entity
Debug
Diagnostic Mode
Turning it ON, it reveals debug settings.
Other features
Power XL Specific Formulas
USERNAME()
Returns the whole name of the current user (First name + Last name)
DOMAIN()
Returns the domain of the current user (e.g.: poweronbi.com)
USERPRINCIPALNAME()
Returns the whole email address of the current user.
IFISROWDIRTY()
Evaluates and returns its parameter when any field of the current row has been changed by the user.
IFISRANGEDIRTY()
Evaluates and returns its first parameter when any field within the specified range (as the second parameter) has been changed by the user.
CUBE.FILTER(TableName, ColumnName)
This formula is typically used for master-detail tables or in conjunction with SmartFilter.
A typical usage example is: =IFISROWDIRTY(CUBE.FILTER("SalesTest", "Customer ID"))
The CUBE.FILTER function retrieves all SmartFilter values associated with the provided Table and returns the value if there is only one unique value for the specified Field. However, if there are multiple values for the Field, the function returns null.
CUBE.FILTER supports column types such as Text, Number, Date, and Selection.
Note: The formula is not editable in Reading view for selection column types.
Implementation of Computed / Default Values
To implement the same functionality in Power XL Table as in the TableEditor visual, you can utilize the IFISROWDIRTY() formula. This formula allows you to set computed or default values based on whether a row has been modified by the user.
For example, let's say the Power XL Table has an audit trigger on the database side that requires capturing the current user's email address (modified by) and the current date and time (modified when).
To achieve this, follow these steps:
1, Select the first row of the "Modified By" column and use the following formula:
=IFISROWDIRTY(USERPRINCIPALNAME())
This formula will populate the "Modified By" column with the email address of the user whenever they make changes to a row.
2, Select the first row of the "Modified When" column and use the following formula:
=IFISROWDIRTY(NOW())
This formula will update the "Modified When" column with the current date and time whenever a user modifies a row.
The Power XL Table visual will automatically copy these formulas to all other rows. Once the configuration is complete, whenever a user makes any modification to a row, the "Modified By" column will be updated with their email address, and the "Modified When" column will be updated with the current date and time.
It's worth noting that not only can you use these functions as parameters, but you can also incorporate other formulas or calculations as needed.
❗ Please keep in mind, that when we support our clients and partners we are focusing on our product and not on Excel functionalities.
Troubleshooting
For all cases, please visit our Knowledge Base at: https://support.poweronbi.com/ to find a solution for your problem. Below you can find common cases. If your issue cannot be solved by the provided materials, please open a ticket on our support site, and PowerON will assist you.
Network Error
Symptom: You receive Network Error message when you try to save data.
Cause: You may get this error typically in the following cases:
- the Write-Back Service URL is not set correctly – or it is malformed - in the Data Entry settings
- the Write-Back Service is not reachable or off-line
- bad connection name or/and type was specified
- the license service is stopped unexpectedly
- in case of On-premises or Gateway installations the Windows Authentication setting is turned accordingly in the visual under Data Entry based on the IIS authentication settings
- Missing files in the web service folder, or typo / malformed strings in the web.config file
- Windows / Kerberos authentication issue
- Missing Service Principal Names
- Missing Active Directory permissions for service accounts
- Report server URL web service URL format mismatch
- Invalid SSL certificate
Solution: Make sure that the Write-Back Service is up and running and reachable (firewall not interfering) as it is described earlier in this document. Verify that the referenced connection exists in the Write-Back Service configuration and the connection type is selected correctly.
A particular error can indicate a license service failure. Please refer to this article:
If you encounter CORS issue, please check the web.config file of the Write-Back Service for typos, and also missing DLL-s and config files inside the web service folder. As a last resort, try updating the web service file following these articles:
- https://support.poweronbi.com/portal/kb/articles/how-to-update-the-service-manually-azure-cloud
- https://support.poweronbi.com/portal/kb/articles/how-to-update
If you encounter SSL error, make sure that the certificate is issued by a trusted authority for the full qualified domain name of the IIS server, or that the certificate is set to ignore by the client’s browser in case of self-signed certificate, or if the certificate is issued internally by your organization and you try to reach the report outside of the organization domain.
If you are using Power BI Reporting Services On-premises, make sure that the report server URL and the web service URL format matches. Either both must reference the machine name or the full qualified domain name, and both must be http or https. Also, if Windows Authentication is set in the IIS configuration make sure that Windows Authentication is enabled in your visual under [Data Entry] group.
In case of On-premise installation in a domain with Windows Authentication, make sure that Service Principal Names are created for your SQL and SSAS servers and the correct domain users are used for the services. An SPN is also needed for the service account that is running the PPWebService on the IIS machine as the Application Pool user. Make sure that delegation is enabled in your Active Directory from the App Pool’s user (which must be a trusted user) to the SQL/SSAS services. If these are not set correctly, Kerberos authentication issues can occur, which might result in HTTP 403 or 404 errors or appearing log-in popups. Please refer to the following article and contact your internal IT team: https://support.poweronbi.com/portal/kb/articles/configure-iis-for-kerberos-authentication
The Visual is Not Working in Power BI Desktop or the Settings are Not Shown
Symptom: The visual is not rendered, or Power XL specific setting are not displayed.
Cause: Generally, there can be two reasons for this:
- your machine is running out of memory, therefore Power BI Desktop cannot render the elements properly
- your Power BI Desktop Cache is outdated.
Solution: Free up memory on your computer by closing other applications. For clearing the Power BI Desktop cache, please refer to the article in our Knowledge Base at:
https://support.poweronbi.com/portal/kb/articles/power-bi-desktop-clear-cache
Save Failed
Symptom: You receive Save Failed message when you try to write-back to the selected cell.
Cause: You may get this error if there is a configuration error in your visual, the Write-Back Service is not configured properly, or in the following cases:
- there is a custom validation implemented that prohibits write-back
- SQL objects are interfering with the data modification TSQL statements (like security policies, triggers, unique constraints, etc.)
- the service account used by the Write-Back Service does not have permission on the underlying SQL database to make the necessary modification on the source table
Solution:
- Check if the service account has the necessary permissions, the password has not expired
- Verify that RLS policies or triggers are not prohibiting the operations
If you were not able to overcome your issue, please submit a ticket on our support site or write at vizsupport@poweronbi.com and we will contact you shortly to help you investigate and fix the problem.